

The DevOps Pipeline: A Complete Beginner's Guide
Introduction
Imagine you're working on a project with a team of developers, and every time someone makes a change to the code, things break. Fixing the bugs takes hours, and deploying updates feels like a nightmare. This is where a DevOps pipeline comes in, transforming chaotic development workflows into a smooth, automated process.
A DevOps pipeline is a structured sequence of automated steps that help software teams build, test, and deploy applications efficiently. Instead of manually integrating code changes and troubleshooting errors, a DevOps pipeline ensures that everything flows seamlessly from development to production.
Understanding the DevOps Pipeline
Think of the DevOps pipeline as an assembly line for software development. Just like a car factory automates the process of assembling vehicles, a DevOps pipeline automates the steps needed to turn raw code into a fully functioning application.
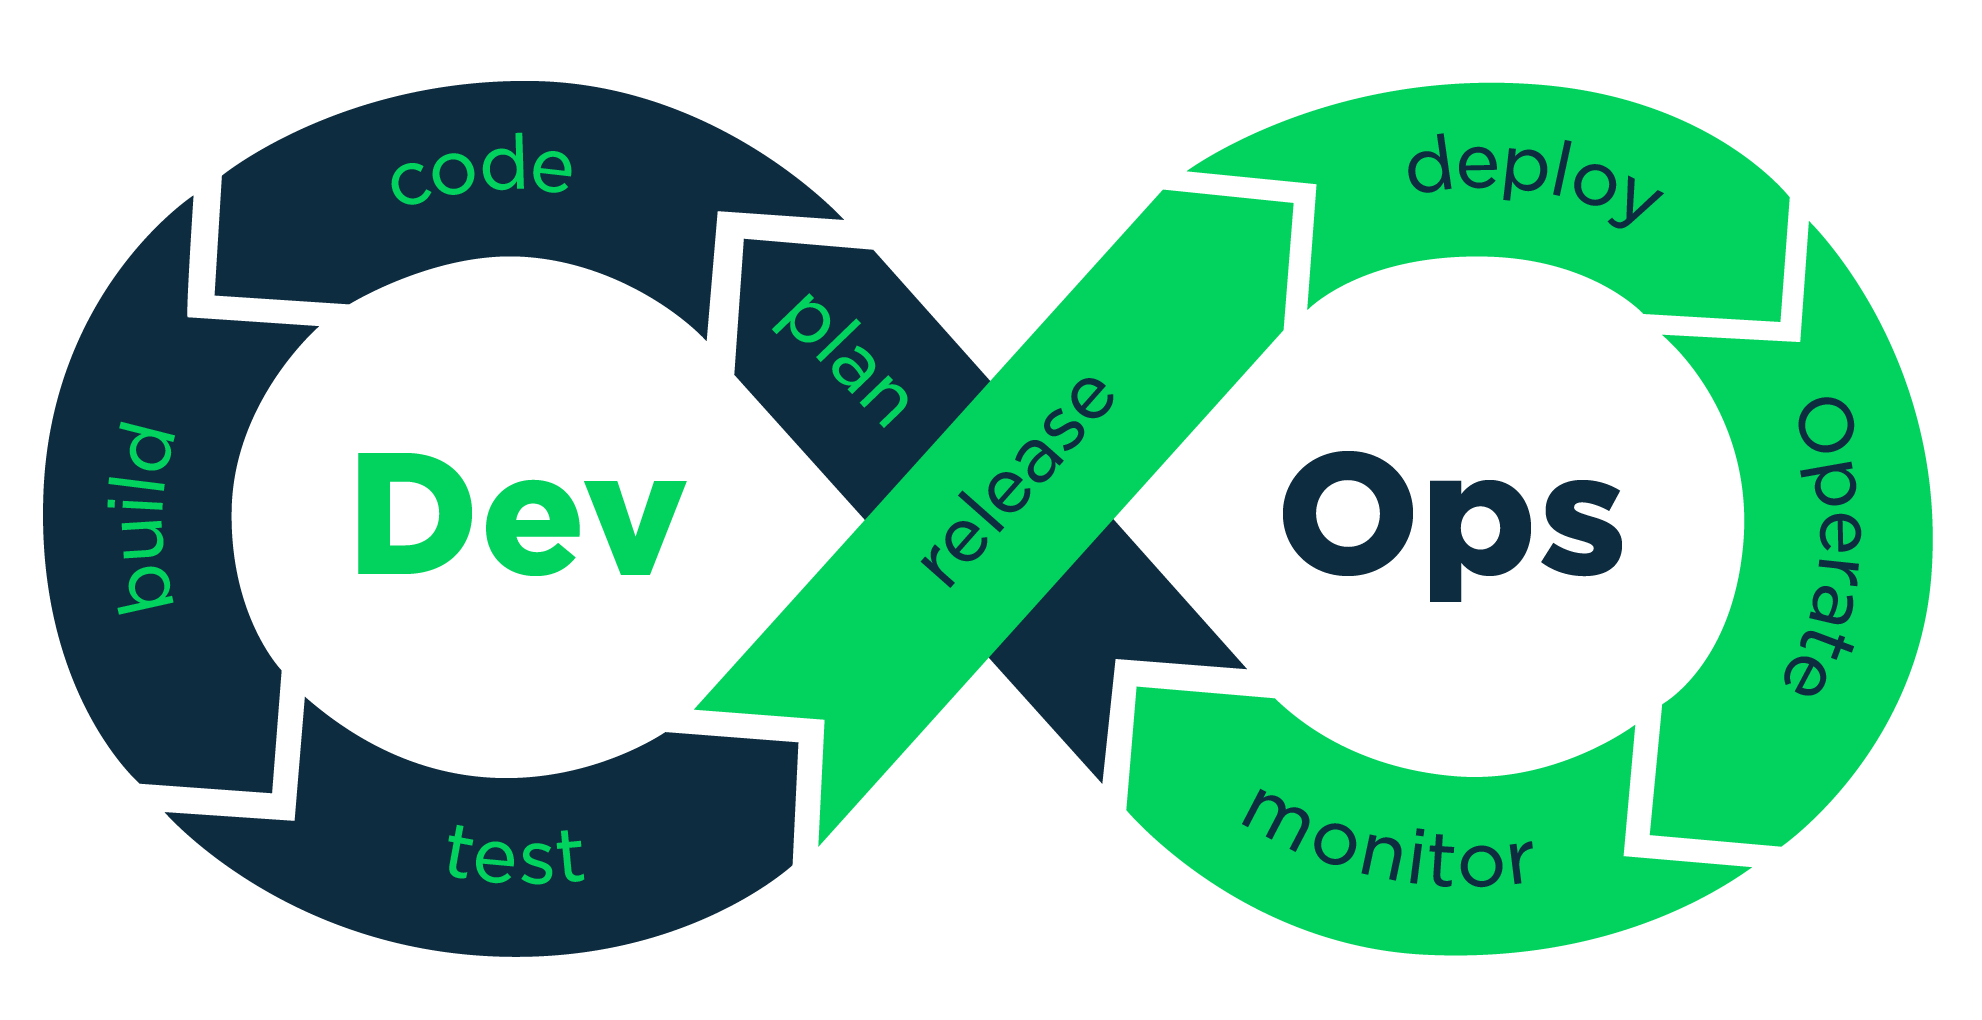
The pipeline consists of several key stages: planning, version control, build and integration, testing, deployment, and monitoring. Each stage ensures that only high-quality code moves forward, reducing errors and improving reliability.
How to Implement a DevOps Pipeline
Let’s walk through the process of setting up a DevOps pipeline step by step.
Step 1: Set Up Version Control
The first step in building a DevOps pipeline is implementing version control. This means using a system like Git to track code changes and collaborate effectively.
Start by creating a repository on GitHub, GitLab, or Bitbucket. Then, initialize a Git repository on your local machine and push the code to the remote repository.
git init
git add .
git commit -m "Initial commit"
git branch -M main
git remote add origin <repository-url>
git push -u origin main
Now, your project is under version control, and you can track every change that is made.
Step 2: Integrate Continuous Integration (CI)
Continuous integration ensures that every change made to the code is automatically tested. We can use a CI tool like Jenkins, GitHub Actions, or GitLab CI/CD.
Create a .github/workflows directory and add a YAML file for GitHub Actions:
name: CI Pipeline

on: [push]

jobs:
  build:
    runs-on: ubuntu-latest
    steps:
      - name: Checkout code
        uses: actions/checkout@v2
      - name: Install dependencies
        run: npm install
      - name: Run tests
        run: npm test
This setup ensures that every push triggers an automated build and test process.
Step 3: Automate Testing
Writing automated tests is crucial to catching bugs early. Use testing frameworks like Jest, JUnit, or PyTest, depending on your programming language.
For a JavaScript-based project, you can create test scripts using Jest:
test('adds 1 + 2 to equal 3', () => {
  expect(1 + 2).toBe(3);
});
Run tests using:
npm test
By integrating automated tests into your DevOps pipeline, you prevent faulty code from being deployed.
Step 4: Implement Continuous Deployment (CD)
Once the code is tested, it can be automatically deployed. Use Docker and Kubernetes for deployment. First, create a Dockerfile to containerise your application:
FROM node:14
WORKDIR /app
COPY . .
RUN npm install
CMD ["npm", "start"]
Then, build and push the Docker image:
docker build -t myapp .
docker tag myapp mydockerhub/myapp:latest
docker push mydockerhub/myapp:latest
Use Kubernetes to deploy the container.
apiVersion: apps/v1
kind: Deployment
metadata:
  name: myapp
spec:
  replicas: 2
  selector:
    matchLabels:
      app: myapp
  template:
    metadata:
      labels:
        app: myapp
    spec:
      containers:
      - name: myapp
        image: mydockerhub/myapp:latest
        ports:
        - containerPort: 3000
Apply the deployment:
kubectl apply -f deployment.yaml
Step 5: Monitor and Optimize
Monitoring ensures that the application runs smoothly. Use tools like Prometheus and Grafana to track performance. Set up alerts to notify your team if something goes wrong.
For basic logging, use:
docker logs -f <container-id>
To visualise metrics in Grafana, configure a dashboard and set up alerts for CPU usage, memory consumption, and response times.
Conclusion
A DevOps pipeline automates the entire software development lifecycle, ensuring faster deployments, fewer bugs, and better collaboration. By following these steps, you can build a pipeline that streamlines your workflow and improves software reliability.
Start small, automate gradually, and keep optimising your pipeline to achieve continuous improvement. The more streamlined your process, the more efficient your development team will be.